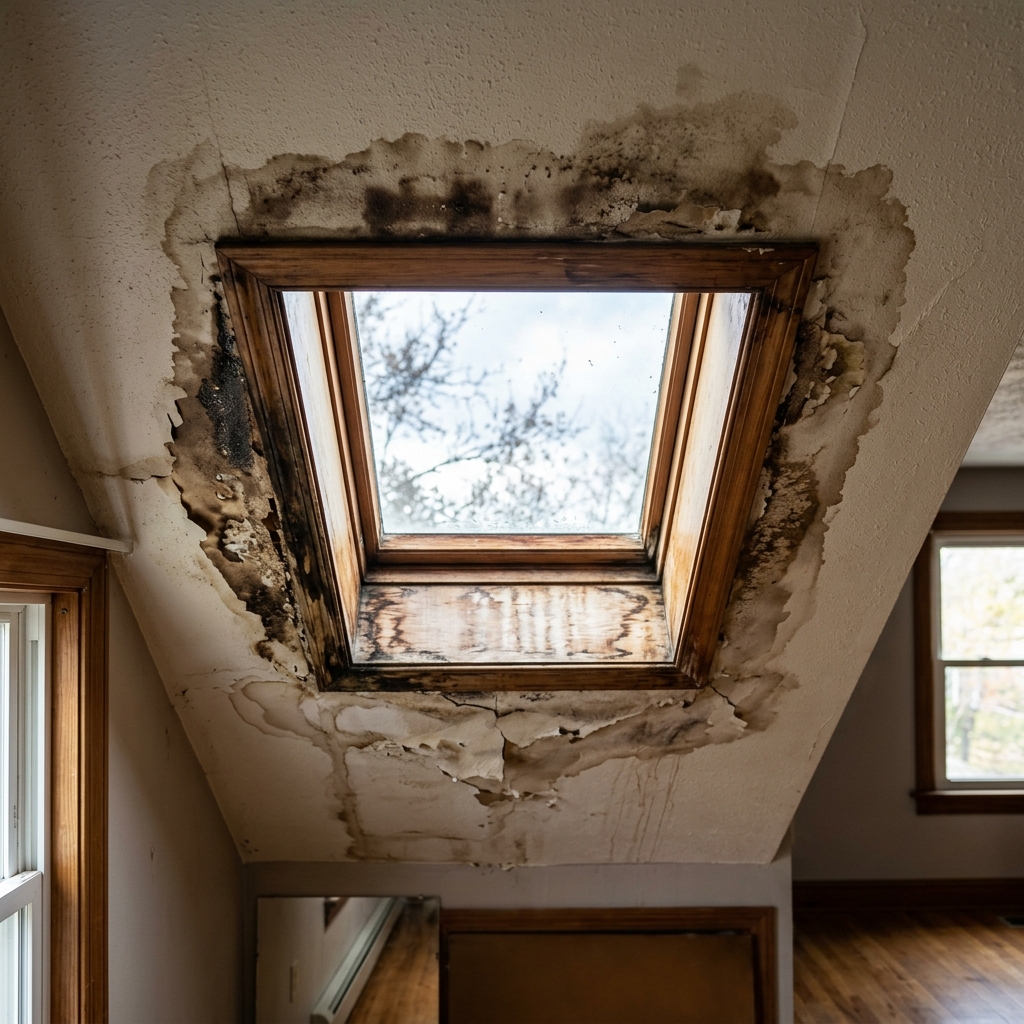
There are few homeownership emergencies as visually terrifying as water aggressively pouring from the ceiling directly above your living room hardwood floor. When that water is cascading from the edges of an architectural skylight, the immediate assumption is catastrophic failure. Skylights are magnificent architectural features that inject brilliant, natural sunlight into dark interior spaces, but they represent a deliberate, massive hole cut directly through the primary waterproof membrane of your home. In the punishing, volatile climate of the Greater Toronto Area—where the roof experiences searing 70°C summer surface temperatures followed by -20°C winter deep freezes—the mechanical seals surrounding that hole endure immense, relentless kinetic stress. The Roof Technician fields thousands of emergency calls annually regarding overhead glazing failures. This exhaustive 2026 technical guide forensically dissects every primary cause of a skylight roof leak Toronto homeowners encounter, providing the precise triage steps required to secure your property, and outlining the exact mathematical thresholds where localized repair becomes a foolish gamble against a necessary full-scale replacement.
Phase 1: Differentiating a True Leak from Winter Condensation
Before mobilizing an emergency repair crew, you must scientifically confirm that the skylight is actually leaking exterior rainwater. Shockingly, over 40% of winter “skylight leaks” reported in Toronto are entirely internal thermal phenomena known as condensation.
The Physics of Condensation: During a bitterly cold January night, the exterior temperature drops rapidly. The glass of your skylight becomes the absolute coldest physical surface inside your warm, heavily heated home. When the warm, highly humid air generated by cooking, showering, and simply breathing rises to the ceiling, it impacts the freezing glass. The moisture instantly drops out of the air and forms liquid water droplets on the interior pane. These droplets accumulate aggressively, run down the glass, pool on the wooden interior frame, and eventually drip onto your floor.
The Diagnostic Test: If the dripping occurs exclusively during the winter, specifically when it is incredibly cold outside but not actively raining or snowing, you have a condensation problem, not a roof leak. If the water is crystal clear and drips from the very center of the glass pane, it is condensation. Conversely, if the water drips during a warm summer thunderstorm, is heavily stained brown with dissolved wood tannins, and actively bubbles the drywall paint surrounding the skylight frame, you have a verified, active, exterior roof membrane failure.
| The Visual Symptom | The Environmental Context | The True Diagnosis | The Required Professional Action |
|---|---|---|---|
| Clear water dripping from the center of the glass. | Deep winter, sub-zero temperatures, no active rain. | Severe Condensation (Thermal bridging failure). | Upgrade to Argon-filled, triple-glazed Low-E glass; reduce indoor humidity. |
| Brown, dirty water dripping from the drywall corner. | During or immediately following heavy rain. | Active Flashing Failure (Water bypassing the metal). | Immediate emergency tarping and complex metal flashing replacement. |
| Water dripping specifically during rapid snowmelt. | Sunny winter day following heavy snow accumulation. | Ice Dam Backup (Water forced under shingles). | Clear the ice dam; aggressive attic insulation upgrades required. |
| Fog permanently trapped between the two glass panes. | Visible year-round, regardless of exterior weather. | Blown Argon Gas Seal (Seal failure). | The glass unit is dead. Complete sash or full unit replacement is mandatory. |
| Water actively pooling on a flat roof skylight dome. | Following heavy rain; no drainage occurring. | Curb Height Failure / Blocked Scuppers. | Rebuild the wooden curb to a higher elevation; clear the flat roof drains. |
The Mechanics of Exterior Skylight Failure
If you have confirmed an active exterior leak, the failure almost certainly resides within the incredibly complex metal flashing system integrating the skylight into the surrounding asphalt shingles.
1. The Step Flashing Collapse
Skylights do not rely on roofing tar to remain waterproof; they rely on gravity and overlapping metal. A premium installation utilizes “Step Flashing.” This system consists of dozens of L-shaped aluminum plates that intricately weave back and forth between every single overlapping layer of asphalt shingles along the sides of the skylight. Operating like gills on a fish, this metal armor catches high-velocity rainwater and forces it outward, around the frame, and back onto the shingles below. If an amateur installer nailed through this flashing, or if massive winter ice expansion bent the metal plates backward, water will violently bypass the armor and pour directly into the attic.
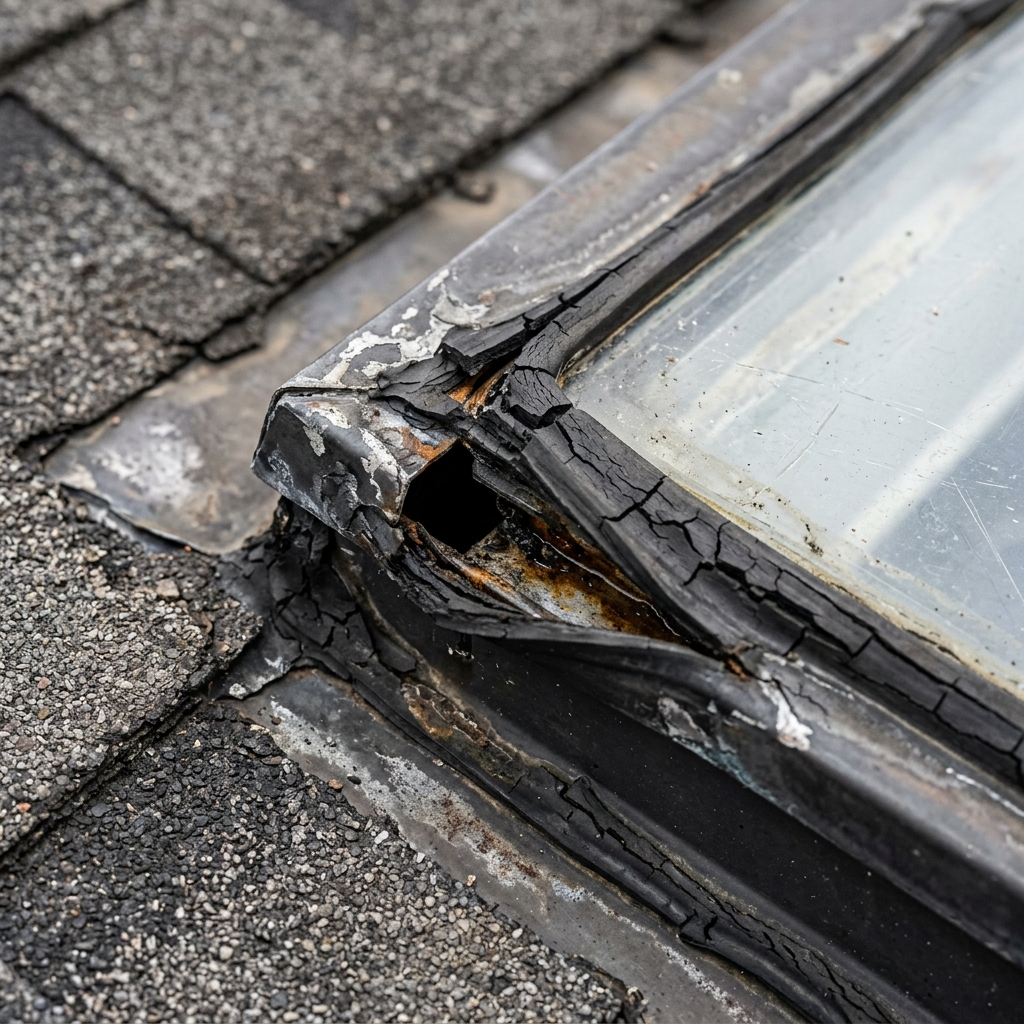
2. Polyurethane Caulking Degradation
While metal step flashing handles the heavy lifting, the final seal where the metal meets the glass frame relies heavily on industrial polyurethane caulking. Over five to seven years, intense UV radiation from the Toronto summer sun relentlessly bakes this caulking. The rubberized sealant dries out, becomes brittle, shrinks, and cracks aggressively. A hairline crack mere millimeters wide is enough to siphon gallons of water inward during a wind-driven rainstorm.
3. Flat Roof “Curb” Failures
A flat roof skylight operates under entirely different physics. Because the roof has zero pitch, water does not slide away; it pools. Therefore, a flat roof skylight must be elevated on a wooden box called a “curb,” lifting it at least 6 to 8 inches above the roof membrane. If the commercial membrane (TPO or Modified Bitumen) is not flawlessly heat-welded up the side of this curb, or if a massive winter freeze-thaw cycle tears the membrane away from the wood, the standing water on the roof will flood directly into the living space below.
| Component Failure Type | The Physical Mechanism of Destruction | Expected Lifespan Before Failure |
|---|---|---|
| Polyurethane Sealant Cracking | Intense UV radiation baking the volatile oils out of the rubberized sealant. | 5 to 7 Years (Requires aggressive proactive maintenance). |
| Aluminum Step Flashing Tear | Violent expansion of solid ice trapped under the metal prying it backward. | 15 to 20 Years (Often outlasts the shingles). |
| Acrylic Dome Shattering | Massive hail impact or heavy, dead tree branches falling during a squall. | Unpredictable (Impact dependent). |
| Wooden Curb Rot (Flat Roof) | Capillary action wicking standing water upward into the raw spruce framing. | 10 to 12 Years (If improperly wrapped in membrane). |
| Internal Argon Gas Seal Blowout | Relentless thermal expansion/contraction of the glass panes popping the seal. | 10 to 15 Years (Highly brand dependent; VELUX lasts longer). |
Emergency Triage: Securing the Envelope
When a severe storm hits and the skylight begins to hemorrhage water, your immediate priority is mitigating catastrophic interior damage while you await the deployment of an emergency roofing crew.
- Contain the Interior Flooding: Immediately place large, heavy-duty plastic bins directly beneath the drip zone. Do not use towels, as they will instantly saturate and ruin the hardwood floors beneath them. Move all expensive furniture and electronics entirely out of the room.
- Puncture the Drywall Blister: If water is actively pooling behind the ceiling paint, creating a massive, sagging “blister,” take a screwdriver and punch a small hole in the absolute center of the sag. This controlled release allows the trapped water to drain cleanly into your bucket, preventing the crushing weight of the water from collapsing the entire drywall ceiling panel onto your floor.
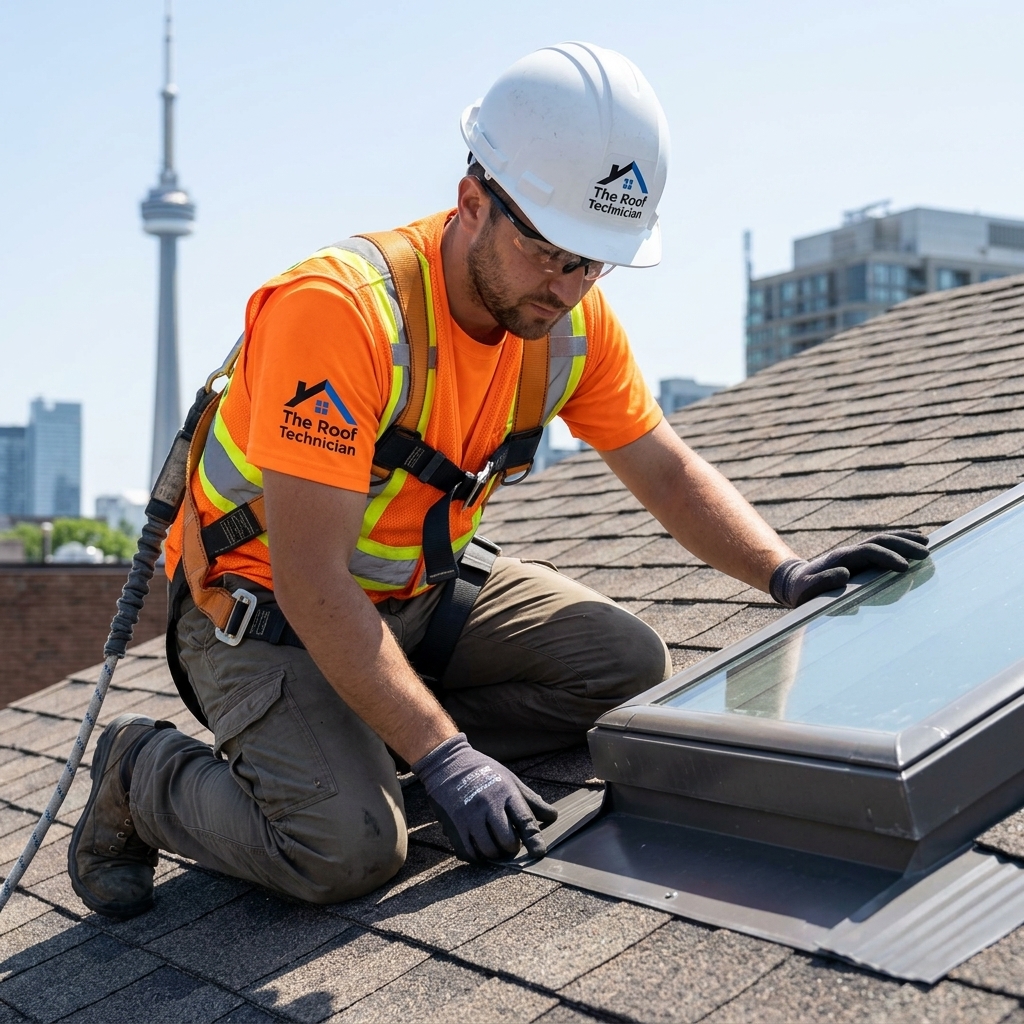
- Never Climb a Wet Roof: This is a non-negotiable safety mandate. An asphalt roof during a rainstorm is incredibly slick; an asphalt roof surrounding a wet skylight is a lethal hazard. Never attempt to climb a ladder with a tarp and a staple gun during a storm. You risk catastrophic injury and will likely shatter the surrounding wet shingles, doubling the cost of the eventual repair. Contact The Roof Technician immediately to deploy a fully harnessed, WSIB-insured emergency response team.
The Economics of Repair vs. Full Replacement
The most agonizing decision for a Toronto homeowner is determining whether to invest $800 in a surgical repair or $3,500+ in a complete skylight replacement. The decision must be purely mathematical, not emotional.
When to Execute a Surgical Repair: If the skylight is manufactured by a premium brand (like VELUX), is less than 10 years old, the internal glass is crystal clear (no fog), and the leak is verified as a simple failure of the exterior polyurethane caulking, a repair is the mathematically correct choice. The roofing crew will strip away the surrounding shingles, remove the compromised metal flashing, install a brand new step-flashing kit, apply fresh, heavy-duty commercial caulking, and weave new shingles back into the roofline. This typically costs between $600 and $1,200 and secures the unit for another decade.
When Full Replacement is Mandatory: If the skylight is an off-brand acrylic dome from the 1990s, the glass is permanently fogged white (indicating a blown Argon gas seal), the wooden interior frame is soft and rotting, or the skylight is currently leaking during an active roof replacement project, you must completely replace the unit. Throwing $1,000 at a 20-year-old rotting skylight is a massive financial error. A brand new, high-performance, Low-E Argon-filled VELUX skylight installed simultaneously with a new roof typically costs between $1,800 and $3,500, provides immense energy savings, and comes with a bulletproof 10-year “No Leak” installation warranty.
| Scenario / Condition | Recommended Action | Estimated 2026 Cost Bracket | Expected Lifespan of Fix |
|---|---|---|---|
| Unit < 10 years old, glass clear, isolated flashing leak. | Surgical Flashing Replacement | $600 – $1,200 | 7 – 10 Years |
| Unit > 15 years old, glass heavily fogged, rotting interior frame. | Complete Unit Replacement | $2,200 – $4,500+ | 20+ Years |
| Executing a full house roof replacement currently. | Mandatory Complete Replacement | $1,500 – $2,800 (Discounted Labor) | 20+ Years |
| Massive winter condensation issues; glass is freezing over. | Replace with Triple-Glazed Unit | $2,800 – $5,000+ | 20+ Years |
| Emergency storm damage (Tree impact shattering glass). | Emergency Tarping + Full Replace | $400 (Tarp) + $2,500 (Replace) | Covered by Home Insurance |
Preventative Maintenance: Extending the Lifespan
If you own skylights, you must actively maintain them. They are not install-and-forget architectural elements. Once every three years, you should hire a professional roofing contractor to execute a comprehensive perimeter audit. The technician will safely navigate the roof, aggressively scrub away the destructive dirt and moss accumulating on the top lip of the skylight, inspect the aluminum step flashing for severe ice damage, and proactively lay down a fresh, heavy bead of UV-resistant commercial polyurethane sealant around the entire perimeter frame. This $300 preventative service definitively prevents the $3,000 emergency replacement.
How can I quickly tell if my skylight roof leak Toronto is actually just winter condensation?
Why did the roofing contractor refuse to just “tar over” the leak and insisted on replacing the flashing?
What is the exact financial cost to completely replace an aging skylight in Toronto?
Why is it an absolute requirement to replace all old skylights when doing a full roof replacement?
Can a massive winter ice dam actually force water straight upward into a sealed skylight?
Does standard Ontario homeowner insurance cover emergency damage caused by a leaking skylight?
Secure Your Home with Professional Skylight Triage
Do not allow a failing overhead seal to silently destroy the expensive interior architecture of your home. A swift, mathematically precise diagnostic is required to stop the water infiltration immediately and protect your property.
Call us today at (416) 826-0040 or request an emergency skylight inspection to deploy our specialized rapid-response technical team.
The Roof Technician has been the elite authority for complex overhead glazing and residential skylight solutions across Toronto, Oakville, Vaughan, and the entire GTA for over two decades. From massive emergency tarping to precision roof replacements, our master technicians deliver uncompromising quality backed by ironclad warranties.