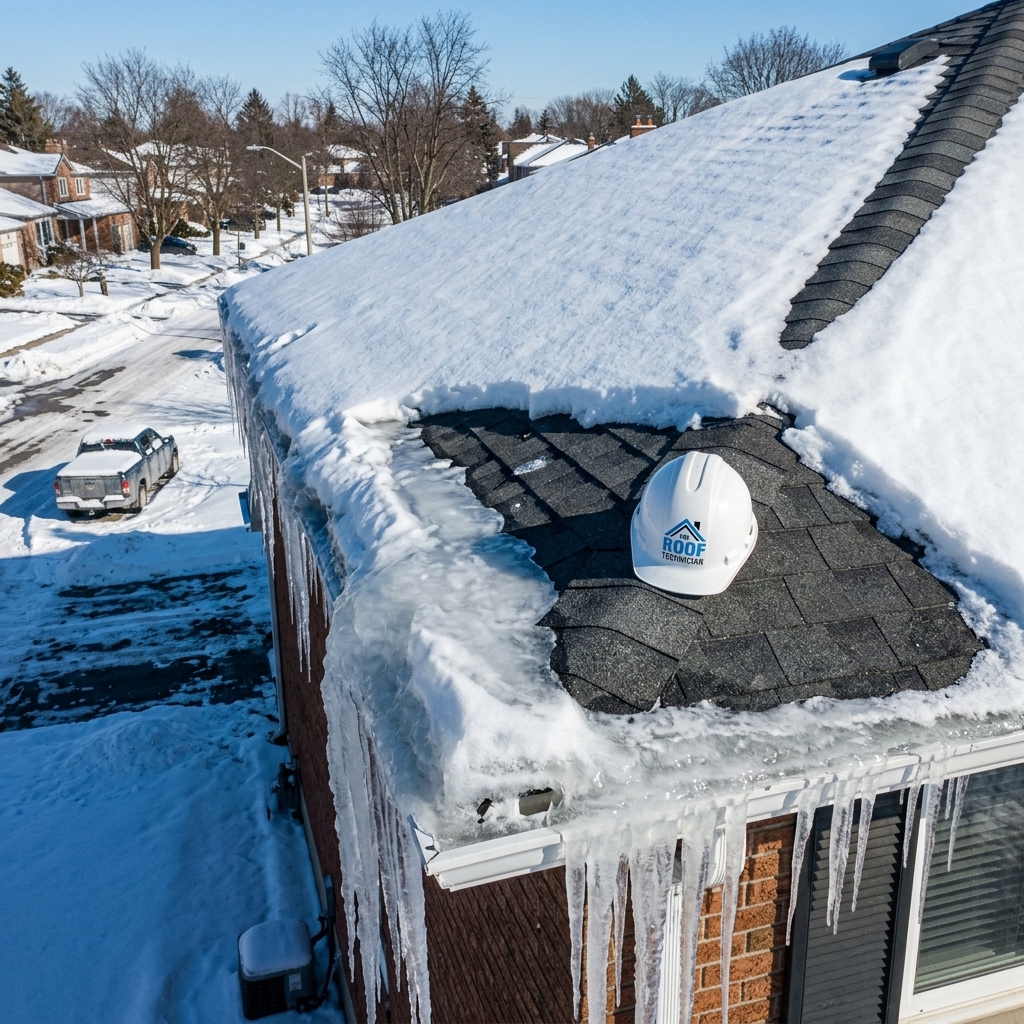
Every winter, thousands of Toronto homeowners discover water stains on their ceilings, peeling paint around upper-floor windows, and mysterious drips that seem to appear only during freeze-thaw cycles. The culprit in most cases is an ice dam — a ridge of ice that forms along the lower edge of a roof and prevents melting snow from draining properly. When water pools behind an ice dam, it backs up under shingles, penetrates the roof deck, and infiltrates the interior of your home, causing damage to insulation, drywall, paint, and even structural framing. Understanding ice dam prevention toronto homeowners can implement before winter arrives is the most effective way to protect your home from this destructive and costly problem.
How Ice Dams Form: The Science Behind Ice Dam Prevention Toronto Homeowners Must Understand
Ice dams are not caused by cold weather alone — they are caused by uneven roof temperatures. When the upper portion of your roof is warm enough to melt snow but the lower portion (the eaves) remains below freezing, melting snow flows downward and refreezes at the cold eaves, forming a growing ridge of ice. As the ice dam grows larger, it creates a pool of standing water on the roof surface that has nowhere to drain. This water eventually finds its way under shingles, through nail holes, and around flashing — penetrating the roof deck and entering your home.
The root cause of uneven roof temperatures is almost always inadequate attic insulation and ventilation. A poorly insulated attic allows heated air from your living spaces to rise into the attic and warm the underside of the roof deck. This heat transfers through the roof sheathing and melts snow on the upper roof surface, while the eaves — which extend beyond the heated building envelope — remain at ambient outdoor temperature. The resulting temperature differential creates the exact conditions ice dams need to form.
The Three Root Causes of Ice Dams in Toronto Homes
| Root Cause | How It Creates Ice Dams | How to Fix It | Cost to Fix |
|---|---|---|---|
| Insufficient Attic Insulation | Heat escapes from living spaces into the attic, warming the roof deck and melting snow unevenly | Add blown-in cellulose or fibreglass to achieve R-60 minimum | $1,500 – $4,000 |
| Inadequate Attic Ventilation | Warm air becomes trapped in the attic with no way to exhaust, creating a hot attic that melts roof snow | Install balanced intake (soffit vents) and exhaust (ridge vent or roof vents) | $800 – $2,500 |
| Air Leaks from Living Space into Attic | Gaps around light fixtures, plumbing stacks, chimneys, and attic hatches allow warm air to bypass insulation | Air seal all penetrations with fire-rated caulk, spray foam, and metal flashing | $500 – $1,500 |
Permanent Ice Dam Prevention Solutions
1. Upgrade Attic Insulation to R-60
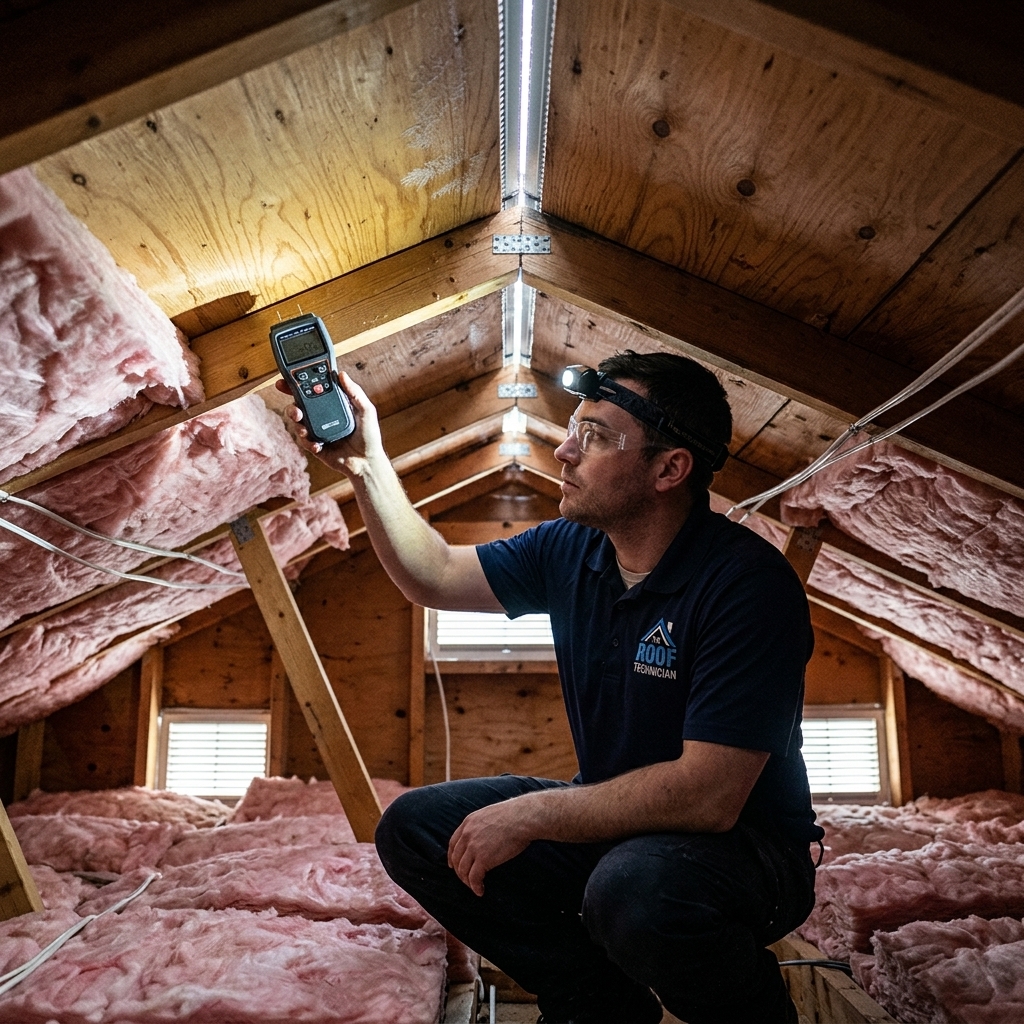
Ontario’s Building Code requires a minimum of R-60 insulation in attic spaces for new construction. However, most Toronto homes built before 2000 have attic insulation levels of R-20 to R-40 — significantly below the current standard. Upgrading to R-60 with blown-in cellulose insulation is the single most effective ice dam prevention measure you can implement, because it dramatically reduces the amount of heat that transfers from your living spaces through the attic and into the roof structure.
Blown-in cellulose is the preferred insulation material for attic upgrades because it fills gaps, conforms to irregular joist spacing, and covers areas that batt insulation cannot reach — particularly around wiring, plumbing, and HVAC ductwork. The installation process takes one day for a typical Toronto home and costs $1,500 to $4,000 depending on the attic size and existing insulation levels. The energy savings from an R-60 attic upgrade — typically $300 to $600 per year in reduced heating costs — mean the investment pays for itself within three to eight years while permanently reducing your ice dam risk.
2. Balance Your Attic Ventilation
Proper attic ventilation maintains a cold attic environment year-round by continuously moving outdoor air through the attic space. A balanced ventilation system includes intake vents (typically soffit vents installed along the eaves) and exhaust vents (ridge vents, turbine vents, or static roof vents installed at or near the peak). When balanced correctly, cool outdoor air enters through the soffit vents, moves upward across the underside of the roof deck (carrying away any heat that does transfer through the insulation), and exits through the exhaust vents at the top.
The Ontario Building Code requires a minimum of 1 square foot of net free ventilation area for every 300 square feet of attic floor space, divided equally between intake and exhaust. Many older Toronto homes have blocked or insufficient soffit vents — often because insulation has been pushed against the soffit openings, eliminating intake airflow entirely. Installing proper ventilation baffles (foam or cardboard channels that maintain an air gap between the insulation and the roof deck at the eaves) is essential to ensure intake ventilation is not compromised by insulation.

3. Air Seal the Attic Floor
Air sealing is the most overlooked component of ice dam prevention. Even with R-60 insulation, warm air from your living spaces can bypass the insulation entirely through gaps and penetrations in the attic floor — including recessed light fixtures, plumbing vent stacks, bathroom exhaust fan housings, electrical junction boxes, the chimney chase, and the attic access hatch. These air leaks can transfer enough heat into the attic to warm the roof deck and cause ice dams even in a well-insulated attic.
Professional air sealing involves identifying every penetration from the living space into the attic and sealing each one with the appropriate material — fire-rated caulk or high-temperature sealant around chimneys and flue pipes, expanding spray foam around plumbing and electrical penetrations, rigid metal flashing with fire-rated sealant around chimney chases, and weatherstripping with an insulated cover for the attic access hatch. The cost for professional air sealing ranges from $500 to $1,500 and should always be completed before adding new insulation, so the new insulation does not cover and conceal the air leaks that need to be sealed.
Ice and Water Shield: Your Last Line of Defence
While insulation, ventilation, and air sealing address the root causes of ice dams, a self-adhering ice and water shield membrane applied directly to the roof deck provides a critical last line of defence if ice dams do form despite your preventive measures. Ontario’s Building Code requires ice and water shield along the first 36 inches (minimum) of the roof from the eaves edge on all new roofing installations. Best practice — and what The Roof Technician installs on every roof replacement — is to extend ice and water shield a minimum of 6 feet from the eaves (or 24 inches beyond the interior wall line, whichever is greater) to ensure complete protection against water backup from ice dams.
| Protection Layer | What It Does | Installation Timing | Cost |
|---|---|---|---|
| Ice and Water Shield (self-adhering membrane) | Creates a waterproof barrier that seals around nail penetrations — even if water backs up under shingles, it cannot reach the roof deck | During roof replacement (applied directly to roof deck before underlayment and shingles) | $2 – $4/sq ft (included in most quality roof replacements) |
| Heated Cable Systems | Electric heating cables installed in a zigzag pattern along the eaves melt ice before it can form dams | Can be retrofitted to existing roofs without replacement | $500 – $1,500 installed |
| Metal Drip Edge | Prevents ice from adhering to the fascia board and directs water into the eavestrough | During roof replacement | $3 – $5/linear foot (included in quality installations) |
How Ice Dams Damage Your Home
The damage from ice dams extends far beyond cosmetic water stains. When water penetrates the roof deck, it saturates the attic insulation — dramatically reducing its thermal performance and creating a vicious cycle where the now-wet, compressed insulation allows even more heat transfer, leading to faster snowmelt and larger ice dams. Prolonged moisture exposure promotes mould growth on the roof deck, attic framing, and drywall — a health hazard that requires professional remediation costing $2,000 to $8,000. The structural framing itself can rot if repeated ice dam leaks go unaddressed over multiple winters, potentially compromising the integrity of rafters and ceiling joists.
Emergency Ice Dam Removal: What to Do Right Now
If you currently have an ice dam and are experiencing water damage inside your home, professional removal is the safest and most effective immediate response. The Roof Technician uses steam removal — the industry gold standard — which melts the ice without damaging shingles, gutters, or the roof surface. Never attempt to remove ice dams with a hammer, chisel, ice pick, or pressure washer — these methods damage shingles, crack gutters, and can cause injury from falling ice. Professional ice dam steam removal typically costs $300 to $800 per visit, depending on the severity and accessibility of the dam.
As a temporary emergency measure while waiting for professional removal, you can fill a nylon stocking with calcium chloride ice melter and lay it perpendicular to the ice dam, extending from the roof edge over the eavestrough. This creates a channel through the ice that allows trapped water to drain. Do not use rock salt (sodium chloride) as it damages roofing materials and kills landscaping below. This is a temporary measure only — professional assessment and long-term prevention are essential to stop ice dams from returning.
Cost Summary: Ice Dam Prevention Investment
| Solution | Cost Range | Effectiveness | Longevity |
|---|---|---|---|
| Attic insulation upgrade to R-60 | $1,500 – $4,000 | Very High — addresses root cause | Permanent (50+ years) |
| Balanced attic ventilation | $800 – $2,500 | Very High — maintains cold attic | Permanent (with roof replacement) |
| Air sealing attic floor | $500 – $1,500 | High — eliminates heat bypass | Permanent |
| Ice and water shield (during reroof) | Included in quality replacements | Very High — waterproof barrier | Life of roof (25-50 years) |
| Heated cable system (retrofit) | $500 – $1,500 | Moderate — treats symptom, not cause | 5-10 years before replacement |
| Emergency steam removal | $300 – $800 per visit | Immediate but temporary | Single event |
What causes ice dams on Toronto roofs?
How much does it cost to prevent ice dams permanently?
Should I use heated cables to prevent ice dams?
Can I remove an ice dam myself?
Does ice and water shield prevent ice dams?
How much attic insulation do I need to prevent ice dams in Toronto?
Stop Ice Dams Before They Start — Call The Roof Technician
Ice dams are not inevitable — they are preventable. Our team diagnoses the exact combination of insulation, ventilation, and air sealing deficiencies causing ice dams on your specific home and implements permanent solutions that eliminate the problem at its source. Whether you need an emergency ice dam removal right now or a comprehensive prevention assessment before next winter, we have the expertise and equipment to protect your home.
Call us today at (416) 826-0040 or book your free roof assessment online.
The Roof Technician serves Toronto, Mississauga, Brampton, Oakville, Burlington, Vaughan, Markham, Richmond Hill, and the entire GTA with professional roofing, insulation, and ice dam prevention services.